

This bow is suitable for short-range shooting. You could conceivably hit a squirrel and have squirrel soup for supper, but I doubt it would bring down anything large. However, it is a DANGEROUS WEAPON and could cause serious harm to yourself and/or others. Please be very careful. On my first day with my bow I almost nailed my neighbor in the head... literally, the arrow embedded itself in the ground an inch away from where her head was laying. It was terrifying! I was much more careful after that...
This is a very basic bow. Sometime soon I hope to make a real longbow and use it for competition.
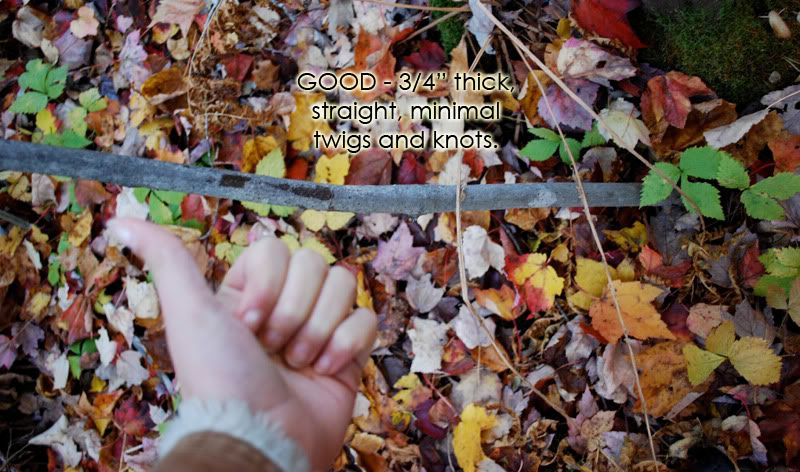
Step One: Find a sapling about 3/4 of an inch (2 cm) thick and anywhere from 2 feet to 3 feet long (about 3/4 of a meter). Longer bows will be prettier and are easier to use; shorter bows are more powerful but take more strength to achieve the range of the longer bows.
Try to find a sapling of one of the following: hickory, yew, elm, oak, ash, hazel, or maple.
The section you use should be as uniformly 3/4" thick as possible.
Carefully cut down the sapling and cut out the section you want to use.
Step Two: Using a pocketknife (please be careful), cut away all bark. If desired, use sandpaper to smooth out your bow. Try not to cut too deep!

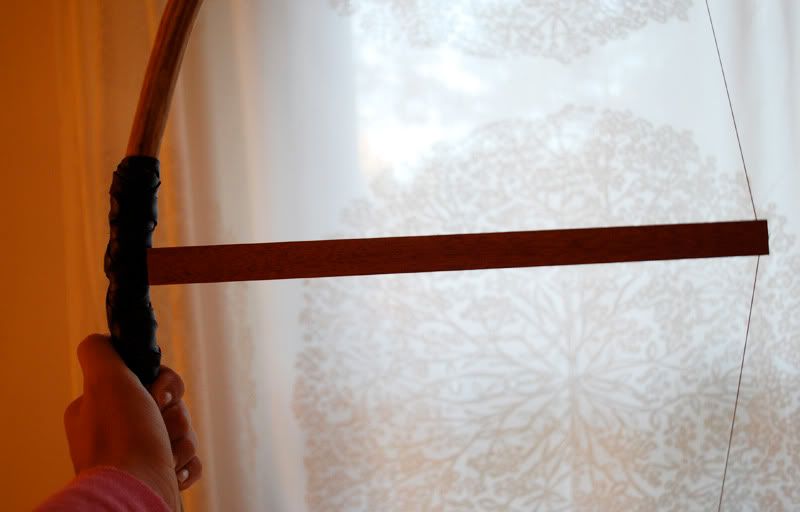
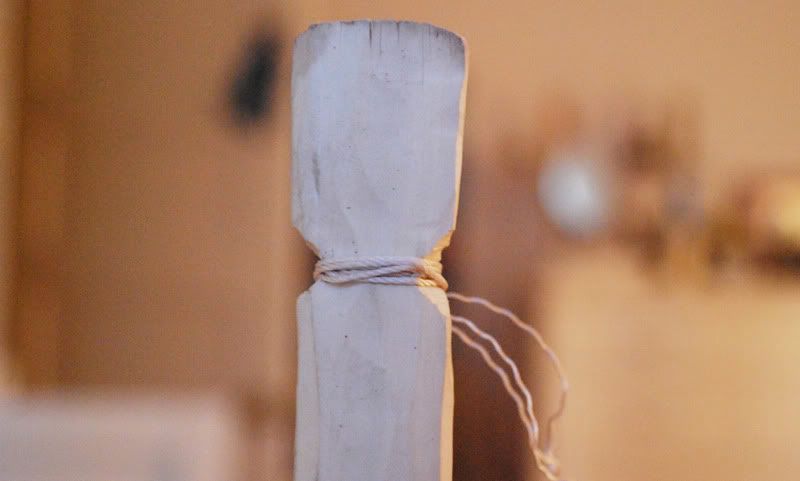
Step Three: Securely tie some strong string that will not stretch (like kitestring) to each end of the bow, as tightly as possible. There should be at least a faint curve. Take a block of wood or forked stick about 12-15" long (30-37cm) and place it between the wood and the middle of the bow (as shown). Fill a bathtub with enough water to cover the bow and soak it overnight (you may have to weight it down to keep it from floating).
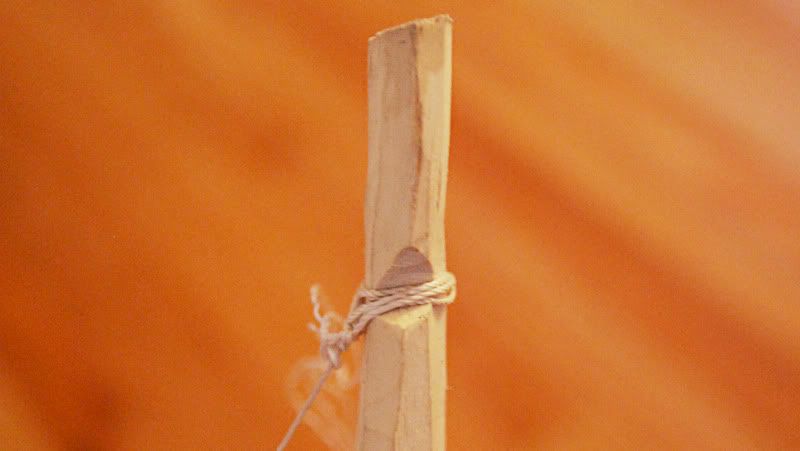
Step Four: In the morning (after removing the bow from the bathtub) when you take the block and string off, the bow should have a pronounced curve. Now, take your knife and make both ends quite flat and narrow (see photo). Cut notches into either side; this is where your string will go.
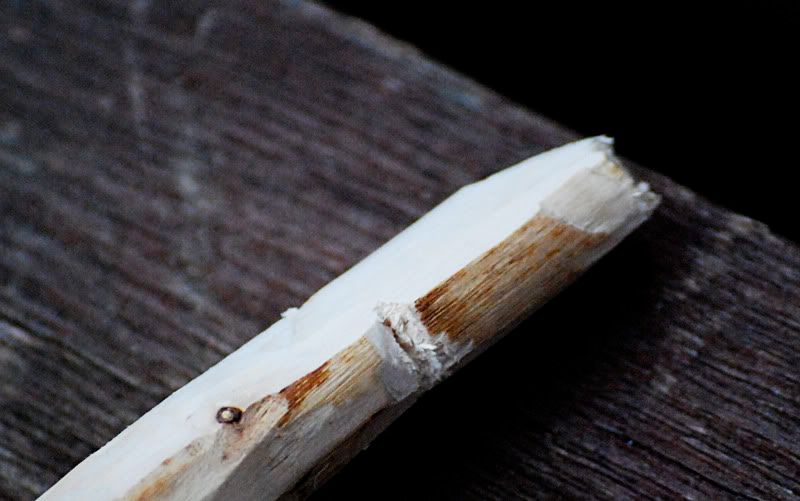 |
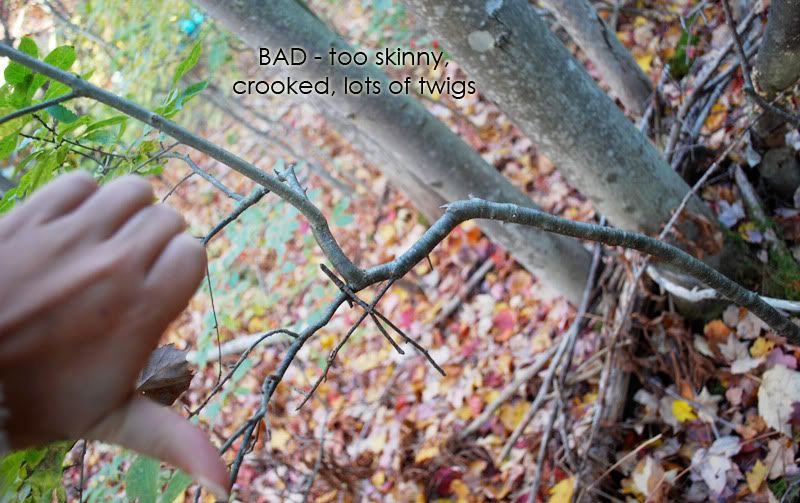
| This is too thick! |
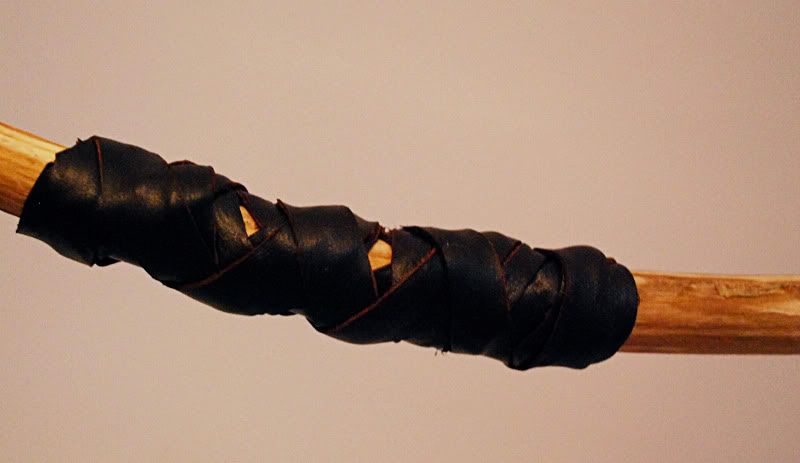
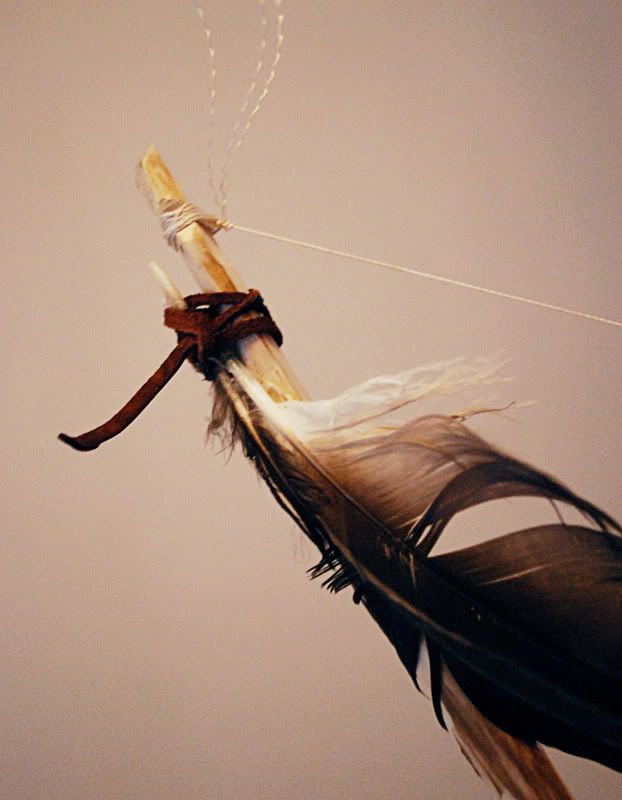
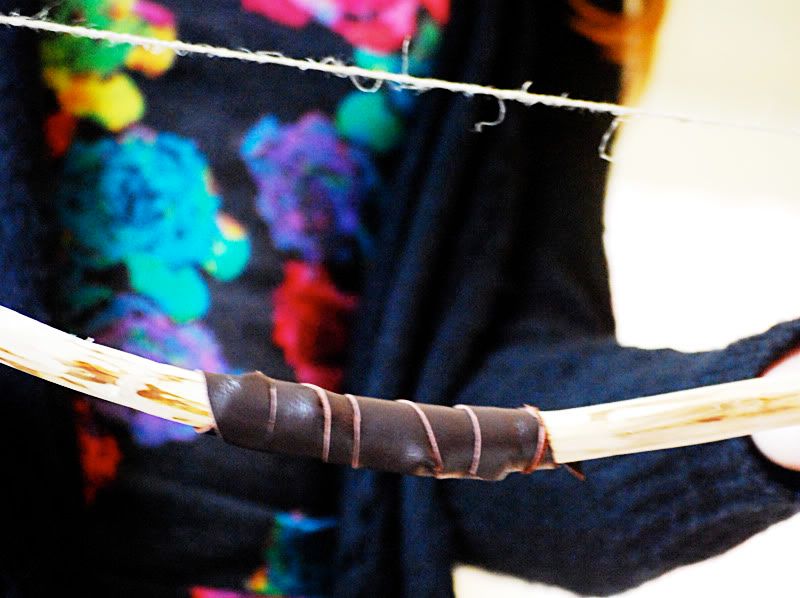
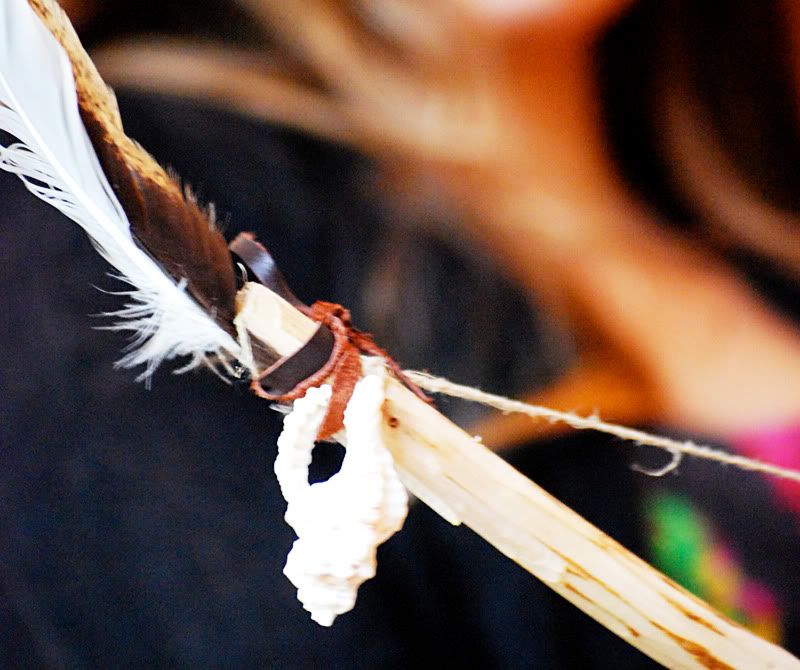
Step Six (Optional): I like to make my bows more comfortable and pretty, so I wrap leather strips around the middle as a grip (you could also use plain fabric, burlap, or suede) and use smaller leather strips to attach feathers, shells, and bits of seaglass to the top (plain string works fine too).
And you're done! Your bow is ready. Get used to using it and it will definitely grow on you. I've found that older handmade bows work better than new ones, perhaps because their curve becomes more pronounced. You'll find that the string and arrows cut your fingers; I suggest wearing fingerless biking gloves or garden cloves with the tips cut off from mid-knuckle to avoid injury. Also, be careful not to break your bow... depending on what wood you used and how you sculpted it, some are more delicate than others. (Mine, for example, has been left outside in a major rainstorm for about a week, used as self-defense against hungry chickens {the body part, not actually shooting}, and many other adventures... it looks like it is new!) Restring your bow as necessary. Arrows and their tips (target, hunting, etc) can be purchased for relatively little at stores like WalMart (shudder... I hate WalMart... my arrows are old wooden ones I got a garage sale).
 |
| The bow I made for Elránia. (Short) |
 |
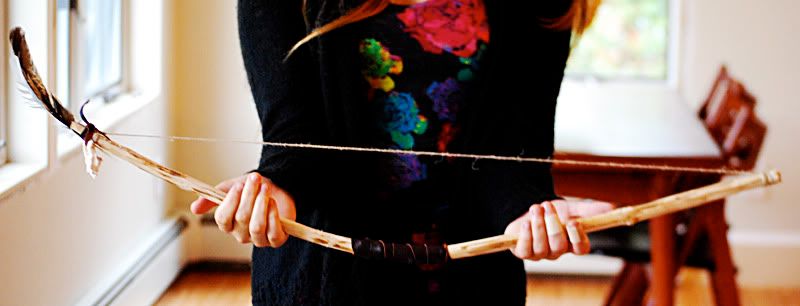
| My (finished) bow. It's longer. |
Have fun! If you'd like to post a link of your own bow after following the tutorial, I'd love feedback on how it worked for you. :)
Thank you so much for this tutorial. I've been wanting to try archery for a while now, so I'm definitely going to check this out.
ReplyDeleteAlexis
Thank you for this post! I've always wanted to make a bow. I actually do competition archery.
ReplyDeleteThat's awesome! Thank you so much. I'm definitely going to try this.
ReplyDeleteWow, that is so cool! It looks awesome! :)
ReplyDeleteMe and my mom would L-O-V-E this! We've always been talking about how beautiful and amazing archery is... if any kind of weapon, it's the most graceful, and probably the most awesome. I'm going to tell her about it!
ReplyDeleteP.S
Much better than those dumb rubber ones you can buy at Walmart.
How cool! I have to try this sometime.
ReplyDelete~bree
Thanks so much for this tutorial Olivia! I've been wanting to make a bow for awhile... and now I can thanks to you. =D I'm going to try this soon.
ReplyDeleteIn Christ,
Emily
Oh my gosh this is too cool! I'll have to show my brother, and we'll have to make one together.
ReplyDeleteYou should submit this to The Crafty Crow? She would love this!
When I was small my brother and I used to make bows too, but not nearly as complicated as these. They often didn't work too well either, but hey, we were little kids. We just took a stick and cut off the bark, then strung it and hand-made some arrows. It was really fun, and sometimes they were decent enough to shoot the length of my backyard. I will have to try out making a bow this way too.
ReplyDeleteHey, I have a free online magazine for Christan girls and was wondering if you'd like to check it out? If you do go to www.forevermagazine.webs.com
ReplyDeleteGod bless, Hope
Cool! Lol, the "squirrel soup" reference made me think of when I was looking through The Joy of Cooking, and found a section on game. I was mortified by the contour diagrams about skinning squirrels (what can I say? I think squirrels are cute!).
ReplyDeleteArchery is so cool! As for weapons, I'm a fencer, so naturally I'm more into swords. But if I ever find the time to do this ( hope I do), then I'll definitely try it out. Bu the way, I hate Walmart too.
Awsome bow i'm going to try to make it,
ReplyDeleteHey Olivetree,
I was wondering if you would be interested in entering a photo contest on my blog it's called Guitar photo contest:)
P.s. it will be held on my second blog taylorguitars.blog.com
your blogger friend Lynn
I'm TOTALLY trying this tommorow! I'll do a full length post (complete with pictures) tomorrow on how well I did. :) I'll be sure to comment again with a link to it! You're so talented!! Keep up the good work.
ReplyDelete~Autumn
Gorgeous!
ReplyDeleteWow. That looks awesome! I'll have to get around to trying that sometime.
ReplyDelete(I hate Wal-Mart too. :P)
thanks olive tree! i'm going to try do you think you could try making a tutitorial on making arrows? my mom won't let me buy any, i already asked!
ReplyDelete(i HATE Wal-Mart)
Mim
i have three boys, may have to try this!
ReplyDeleteCool! I do archery, but I've never made my own bow. (well, unless you count the pencil-shooting twig bows my friend and I made when we were 12) :D
ReplyDeleteI have made arrows by cutting notches in the ends of dowels and sharpening the end with a pencil sharpener. For an activity with kids I have made arrows with tips cut from sponges.... you can stamp them on a stamp pad and have fun playing target practice. Actually I usually just find sproingy saplings or branches and if they're bendable but green enough to not be breakable, I make them into a bow. Also have used green bamboo. That's to do it quick and easy with kids though. Yours is much more beautiful and enduring! Was very glad to read about how you did it.
ReplyDelete